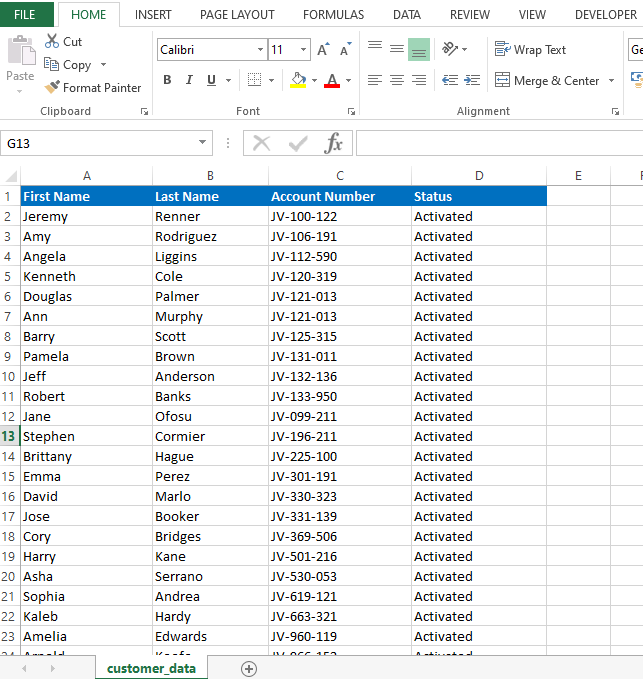
When you use Excel for your personal, office or business work, you will often need to delete entire rows from the worksheets. In this lesson you will learn how to delete rows in Excel. There are few different ways to delete rows manually. I will explain them one by one. Let’s consider this sample Excel sheet.
Here is the first method to delete rows manually.
Method 1
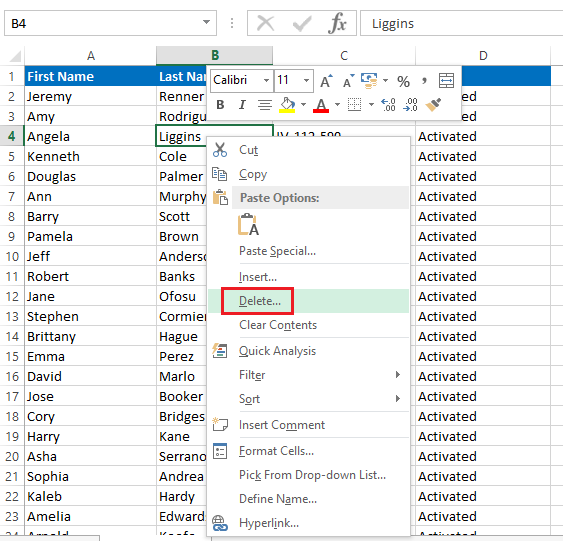
Right click on a cell of the row you wish to delete. Then select “Delete” from the drop down menu.
Then the “Delete” window will appear like this. Select the “Entire row” option button and click OK.
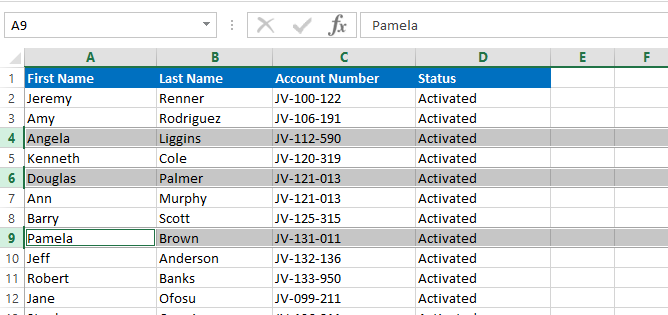
You can also use this method to delete multiple rows as well. First select atleast one cell from each row you want to delete. In this example Excel sheet, I have selected rows 6, 8, 10 and 12. You can use the Ctrl key on your keyboard to select multiple cells. (Press Ctrl key while selecting cells.)
Now you can follow the same steps you followed to delete one row.
Method 2
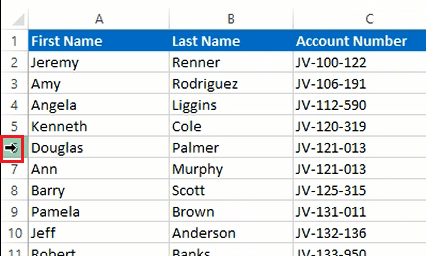
In this method, first you should take the mouse to the left most side of the Excel sheet. When you take the mouse on top of the row numbers, the mouse pointer will be changed to an arrow like this.
Now click the right mouse button. Select “Delete” from the menu. Row will be deleted instantly.
Likewise you can use this method to delete multiple rows in Excel sheets. First select the rows you want to delete. You can use the Ctrl key on your keyboard to select multiple rows.
Once you select the rows, you can follow the same steps followed to delete a single row.
Sometimes we may need to delete a set of adjacent rows in Excel. This video shows how to select a set of contiguous cells easily and then delete the entire rows.
Here is also an alternative way to delete a set of adjoining rows.
Also read
How to Read, Write, Delete and Move excel comments
Record a Macro in Excel
Clear Contents of Excel Sheet Except First Row Using VBA


