In this lesson, we will explore how to extract the selected value from a multicolumn listbox using VBA in Excel. This is particularly useful when you have a listbox filled with multiple columns of data and you need to retrieve specific values based on user interaction. The process may seem complex, but with the right approach, it becomes a straightforward task.
Using the ListIndex Property
Extracting Value from a Specific Column of the Selected Row - Using List Property
Handling Multiple Selections For MultiSelect Enabled ListBoxes
Extracting Selected Value from a Listbox - Using Column Property
Tips and Tricks for Effective Coding
Before diving into extracting values, it's crucial to understand what a listbox is. Essentially, it's a VBA control that can display items across multiple columns, like a simple table or spreadsheet. This functionality is very useful when you need to show more than one attribute of an item in a VBA control. Because in other VBA controls such as text boxes you can only show one attribute. So the VBA listboxes enhance the user experience by allowing users to view and select from a range of related data points.
Now let’s look at how we can get selected items from a VBA listbox in a few different ways.
Above is a sample dataset consisting of twenty data entries. This dataset includes various fields such as Medicine ID, Medicine Name, Unit, Price, Supplier Name, Address, Phone, Rating and Supply Time. Please note that this data is entirely fictional and created for example purposes only.
Understanding the Listbox Properties
Before diving into the code, it’s important to understand two crucial properties of the listbox: List and ListIndex. The List property represents the array of items in the listbox, while ListIndex refers to the index of the selected item.
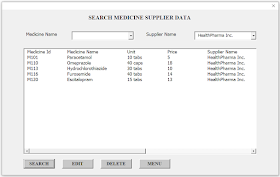
The primary challenge in working with multicolumn listboxes is retrieving the user’s selection, particularly when the listbox contains several columns. Let’s consider this example user form.
User has entered a value in the supplier name field and hit the search button. Now all the data related to that supplier name is shown in the listbox. Assume the name of the form is afrmViewDat and name of the listbox is lstSearchResult.
Using the ListIndex Property
The ListIndex property of a listbox is your starting point. The ListIndex property of a listbox returns the index of the selected item. However, it's important to remember that the index starts at 0. Here’s how you can use it.
Dim selectedIndex As Integer
With frmViewData.lstSearchResult
selectedIndex = .ListIndex
End With
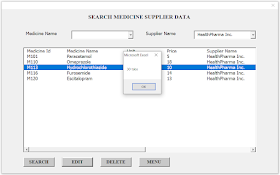
MsgBox selectedIndex
End Sub
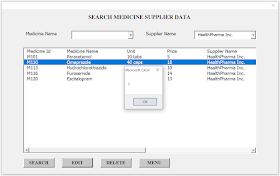
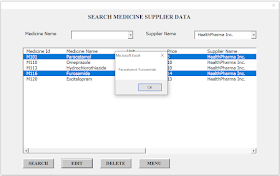
So here is the result of the above subroutine.
This method is straightforward but only works well when single selection is enabled. Because if multiselect is on and if the user has selected multiple items, then this subroutine will only return the index of the item you selected lastly.
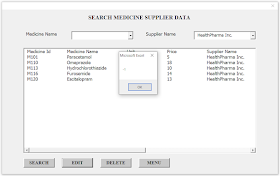
What will happen if the user doesn’t select any item? Then -1 will be returned as the result. So we can use this value to check whether the user has selected any item before executing the rest of the code.
Extracting Value from a Specific Column of the Selected Row - Using List Property
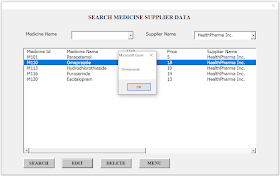
Once you have the row number, you can extract the value from a specific column using the List property. The List property can take two parameters: row index and column index. For instance, if you want to get the value from the second column of the selected row, you can use this approach.
Dim selectedIndex As Integer
Dim selectedValue As String
With frmViewData.lstSearchResult
selectedIndex = .ListIndex
If selectedIndex <> -1 Then
selectedValue = .List(selectedIndex, 1) ' 1 for the second column
Else
selectedValue = "No selection"
End If
End With
MsgBox selectedValue
End Sub
Handling Multiple Selections For MultiSelect Enabled ListBoxes
Things get a bit trickier when dealing with listboxes which are set to allow multiple selections. In such cases, you’ll need to iterate through each item in the listbox, checking if it’s selected and then retrieving the required column values. Below subroutine will get values of the second column for all the selected rows.
Dim i As Integer
Dim selectedValues As String
With frmViewData.lstSearchResult
For i = 0 To .ListCount - 1
If .Selected(i) Then
selectedValues = selectedValues & .List(i, 1) & "; "
End If
Next i
End With
MsgBox selectedValues
End Sub
Extracting Selected Value from a Listbox - Using Column Property
In the above examples, we learnt how to get a selected value using Listindex and List properties. However you can also use the Listindex with Column property to get the selected values from a listbox. Below example subroutine shows how you can get the column 3 value of the selected row.
Dim selectedValue As String
With frmViewData.lstSearchResult
If .ListIndex <> -1 Then
selectedValue = .Column(2, .ListIndex) '2 for the third column
Else
selectedValue = "No selection"
End If
End With
MsgBox selectedValue
End Sub
Tips and Tricks for Effective Coding
Remember that VBA is zero-indexed: The first column is column 0, the second is column 1, and so on. Same for the rows.
Always check if an item is selected in the listbox to avoid runtime errors.
Use meaningful variable names for clarity and maintenance purposes.
Also read
Populate Userform Listbox from Range
Add Horizontal Scrollbar to a Listbox
Fill a Listbox From an Array

